Saturday, July 30, 2011

Irish Soda Bread


 This is another recipe from the bread book I bought the other day.  I've never tried Irish soda bread before, so I really have no reference as to whether or not the flavor and density were on.  That being said, I did really like it.  I have a soft spot in my heart for crusty breads, and this definitely fit the bill.  This is also the first non-yeast bread I've made and I was impressed how well it rose.


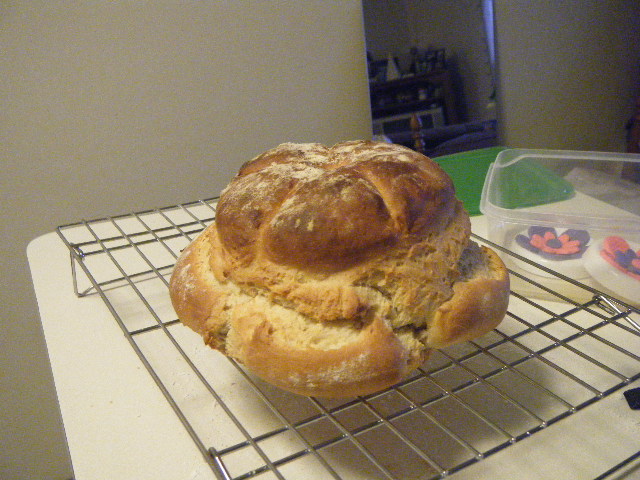
The one issue I had in making it was the stickiness of the dough.  After I added all the required flour it was still unmanageably sticky.  I didn't want to add flour because the directions warned against making dough that was too stiff.  I ended up using a generous amount of flour on my hands when I rolled the dough into balls and that seemed to work alright, but I didn't really get to knead it because it was sticking to everything and any flour on the counter just got worked into the bread right away anyway.  I looked up a video online and the the dough didn't look nearly so sticky so I'm not sure if it was my particular recipe; it's possible it was just really humid that day.  We have had dew points in the70s-80s lately and I know it's really impacted the stiffness of my icing.

-Beth

Friday, July 29, 2011

Roulade (or roll-a-log if you're Chris...)

I made a roulade not too long ago.  It was supposed to have a chestnut filling, but I didn't feel like spending the time or money trying to find chestnut puree so I improvised with what I had on hand. 

Making the roulade itself felt really similar to making a torte- lots of sugar, eggs, and chocolate and not a whole lot else.  I did not have the suggested pan to use, so I just used a baking sheet with deeper sides and that seemed to work.  What I ended up with was what resembled a shallow sheet cake.  I made a filling out of whipping cream, peppermint extract, and a little bit of powdered sugar and cocoa powder.

Rolling the roulade was pretty easy, but I would have liked to let the cake part set for overnight like suggested, since it was really soft.  I didn't end up rolling it as tightly as I would have liked because of that, but it still tasted great.  I sent it to work with a friend of mine who works in a nursing unit and she said everyone liked it there too.

-Beth

A foray into the world of breads


While wandering through Barnes and Noble the other day I came across a marvelous little section of clearance books devoted entirely to the culinary arts. It was a miracle I left with only one book.... In any case, I picked up a book that featured 100 artisan bread recipes.

The first recipe I tried was called "Cottage Bread".  It was a very dense bread and it tasted wonderful smothered in butter. Obviously not a sandwich bread, but very good with dinner.

-Beth

Wilton Flowers and Cake Design in a nutshell

I took another 4 week Wilton course through Michael's in July.  This month was "Flowers and Cake Design".  I really enjoyed the opportunity to learn what even more of the decorating tips I have are used for, and of course the chance to learn how to create a few beautiful flowers.

In the first class we worked on using gum paste and fondant. We made two flowers, a button flower (fanciful) and a pansy (more lifelike).  They were both relatively easy, however it felt almost out of place in the class since we worked with royal icing for the next 3 weeks.

We learned how to make a variety of roses. From left to right pictured below: the Wilton rose, a primrose, and rosebuds. I also improvised an made mini roses.  For some reason the mini ones were a lot easier to make and they turned out adorable.


In addition to the roses, we also worked on apple blossoms, daffodils, violets, and lilies. I found I was decent at making everything except the primroses.  For some reason I never did get the shape of the petals the way I wanted it to look.

We used stiff royal icing for everything.  I think it's a pain to make- it took me the better part of an hour to make a few batches- but it was much easier to work with.  I'm also going to assume that having a stand mixer would definitely speed up the process, or at least make it so I could do  something else while it mixes for ten minutes.

I once made a batch that turned out like fondant.  I'm not quite sure what went wrong, but I plan on using it to frost cookies.  It's almost the consistency of play dough so I should be able to think of something fun to with it.

The last day of class was devoted to decorating our final cakes with all of our flowers and learning a few more flowers not taught during the course of the class. We learned how to make another type of pansy with royal icing and also how to make another version of a mum.

I think I spent the better part of a morning and afternoon making extra flowers to use on the cake.  I tried making a few tiger lilies just to see how it would turn out, and I think it looked pretty realistic. The cakes I've been making lately have been practices for my wedding cake.  I believe I found the recipe I would like to use (it's by Martha Stewart).  Chris even liked it, and he's generally not a fan of cake.  The dimensional dots on the side are also an idea I've been toying with for the cake, only I think I might try it with edible pearls instead.  Overall, I was really please with how this cake turned out.


-Beth


Wednesday, July 27, 2011

Peach Cobbler

I've never made a cobbler before and I've never done anything with peaches other than eat them as they are.  That being said, I had a lot to learn before I could even attempt a peach cobbler and  I have a lot more to learn before I make another.

First off, the peaches in peach cobbler are skinless, so how do you peel a peach?  You don't.  You blanch it and the skins pretty much fall off.  I didn't know what blanching was, but it turned out pretty easy.  Basically you drop a scored peach into boiling water for about 45 seconds and then immediately stick in a bowl of ice water. When it's cool, the skin pulls off easily from the score marks you made. 

Next, you obviously do not want pits in your cobbler... A word to the wise here.  Peaches bruise super easy, and once they are bruised they turn to mush and become very difficult to work with further.  Pitting a peach, according to many internet sources, involves cutting a peach along a diameter down to the pit and then simply twisting both sides of the peach in opposite directions.  Whoever made that work is either using magic or forgot to mention some things in their directions.  The first poor peach I tried this on was in a sorry state after about 15 seconds.  For the rest of the peaches, I sliced away the ends first, exposing the pit, and then sliced along the pit get individual slices off. 

After all of the peach shenanigans, making the cobbler was easy.  Basically the peaches get combined with sugar and cornstarch and then topped with a soft dough that's simply dropped on.  It turned out wonderful.  Don't let the picture fool you!  If I had served warm out of the oven as suggested it would have been picture perfect, however a day in the fridge left the peaches soupy and the breading spongy. It did however, still taste wonderful.

-Beth

Filled Cookie Bites

 I'm not sure what I was thinking the day I tried these, but in lieu of making cookies I decided to cookie bites in a mini muffin pan.  And in lieu of just cookie bites, I decided to try "filling" them with caramel, chocolate, or peanut butter.

It's not a difficult idea to conceive- and I certainly didn't see any reason why it wouldn't work.  I started by putting a layer of cookie dough in the bottom of each cup and making a well to hold the filling of choice.  After adding the filling I put another layer of cookie dough on top and smoothed it out.

I baked the cookies (I used my recipe that I posted a while ago) at 350 until they were golden brown. When I took them out, they looked great.  After 3 minutes out of the oven, they were sadly caved in and significantly less attractive.  That being said, they tasted great.  The caramel ones were a huge headache to make (the caramel was hard to cover with the top layer of cookie dough) and there were a struggle to get out of the pan, but they were the only ones that didn't cave in completely. 

If I make these again, I would try the following changes: 1) I would use caramel candy instead of caramel topping, 2) I would roll the bites in my hands before pressing into the cups to make sure all of the air was out of the center with the filling, 3) I'll probably add 1/2 cup of flour to the dough to make sure it can support it's own weight, and 4) I'll bake at 325 and for slightly longer to give the whole bite time to bake without burning.

 Everyone who tried them loved how they tasted, but the visual appeal just wasn't there.  When I made brownie bites a quick fix for sunken tops was to fill it in with ganache, but I'm hesitant to frost a chocolate chip cookie.  When I searched for solutions online, every recipe I found for cookie bites involved putting different "fillings" on top, not inside the cookie.  Here's to experimentation in the future then.

-Beth